On Saturday, myself and two friends got together to make ourselves paper tape dress forms. The idea had been months in the making, and we finally managed to find a day we could all make. I was really excited about the idea of finally having a dress form, and one that resembles me! Plus, Marion brought chocolate cake (which she cooked while we were doing it, it smelled AMAZING!)!

As I mentioned in my last post on the topic, we’d decided to go for the gummed paper tape method, as the consensus seems to be that they hold their shape better than their gaffa tape counterparts.
I did a fair bit of research beforehand as to the best approach to take when applying the tape (I did NOT want to have to do this twice!) even sent the others a little reading list so they could familiarise themselves with the process beforehand.
Originally we’d planned on doing it in pairs, with 4 of us, but the fourth couldn’t make it. It actually worked well with 3 of us, as having two people taping at a time meant the whole process went a bit quicker.

Supplies!
I’d got things prepared beforehand, and cut a bunch of strips in the lengths I though we’d need. I cut a mixture of lengths – some up to about 15 inches, some at about 6 inches, and a few in between. For the shorter ones, I also cut some of them in half lengthways. It turned out that we almost exclusively used the shorter ones, and a lot of the half width ones. A few longer ones were handy for going over shoulders, but the shorter ones were much more practical for most areas. The thinner ones were great for fitting around curves – the first layer was done pretty much just in the half width strips, but then we did use the wider ones on later layers. For the 3 dress forms, we used about a roll and a half (200m rolls) of gummer paper tape, so about 100m each. However, I have added some more since to reinforce it a bit.

Clare being clingfilmed up!
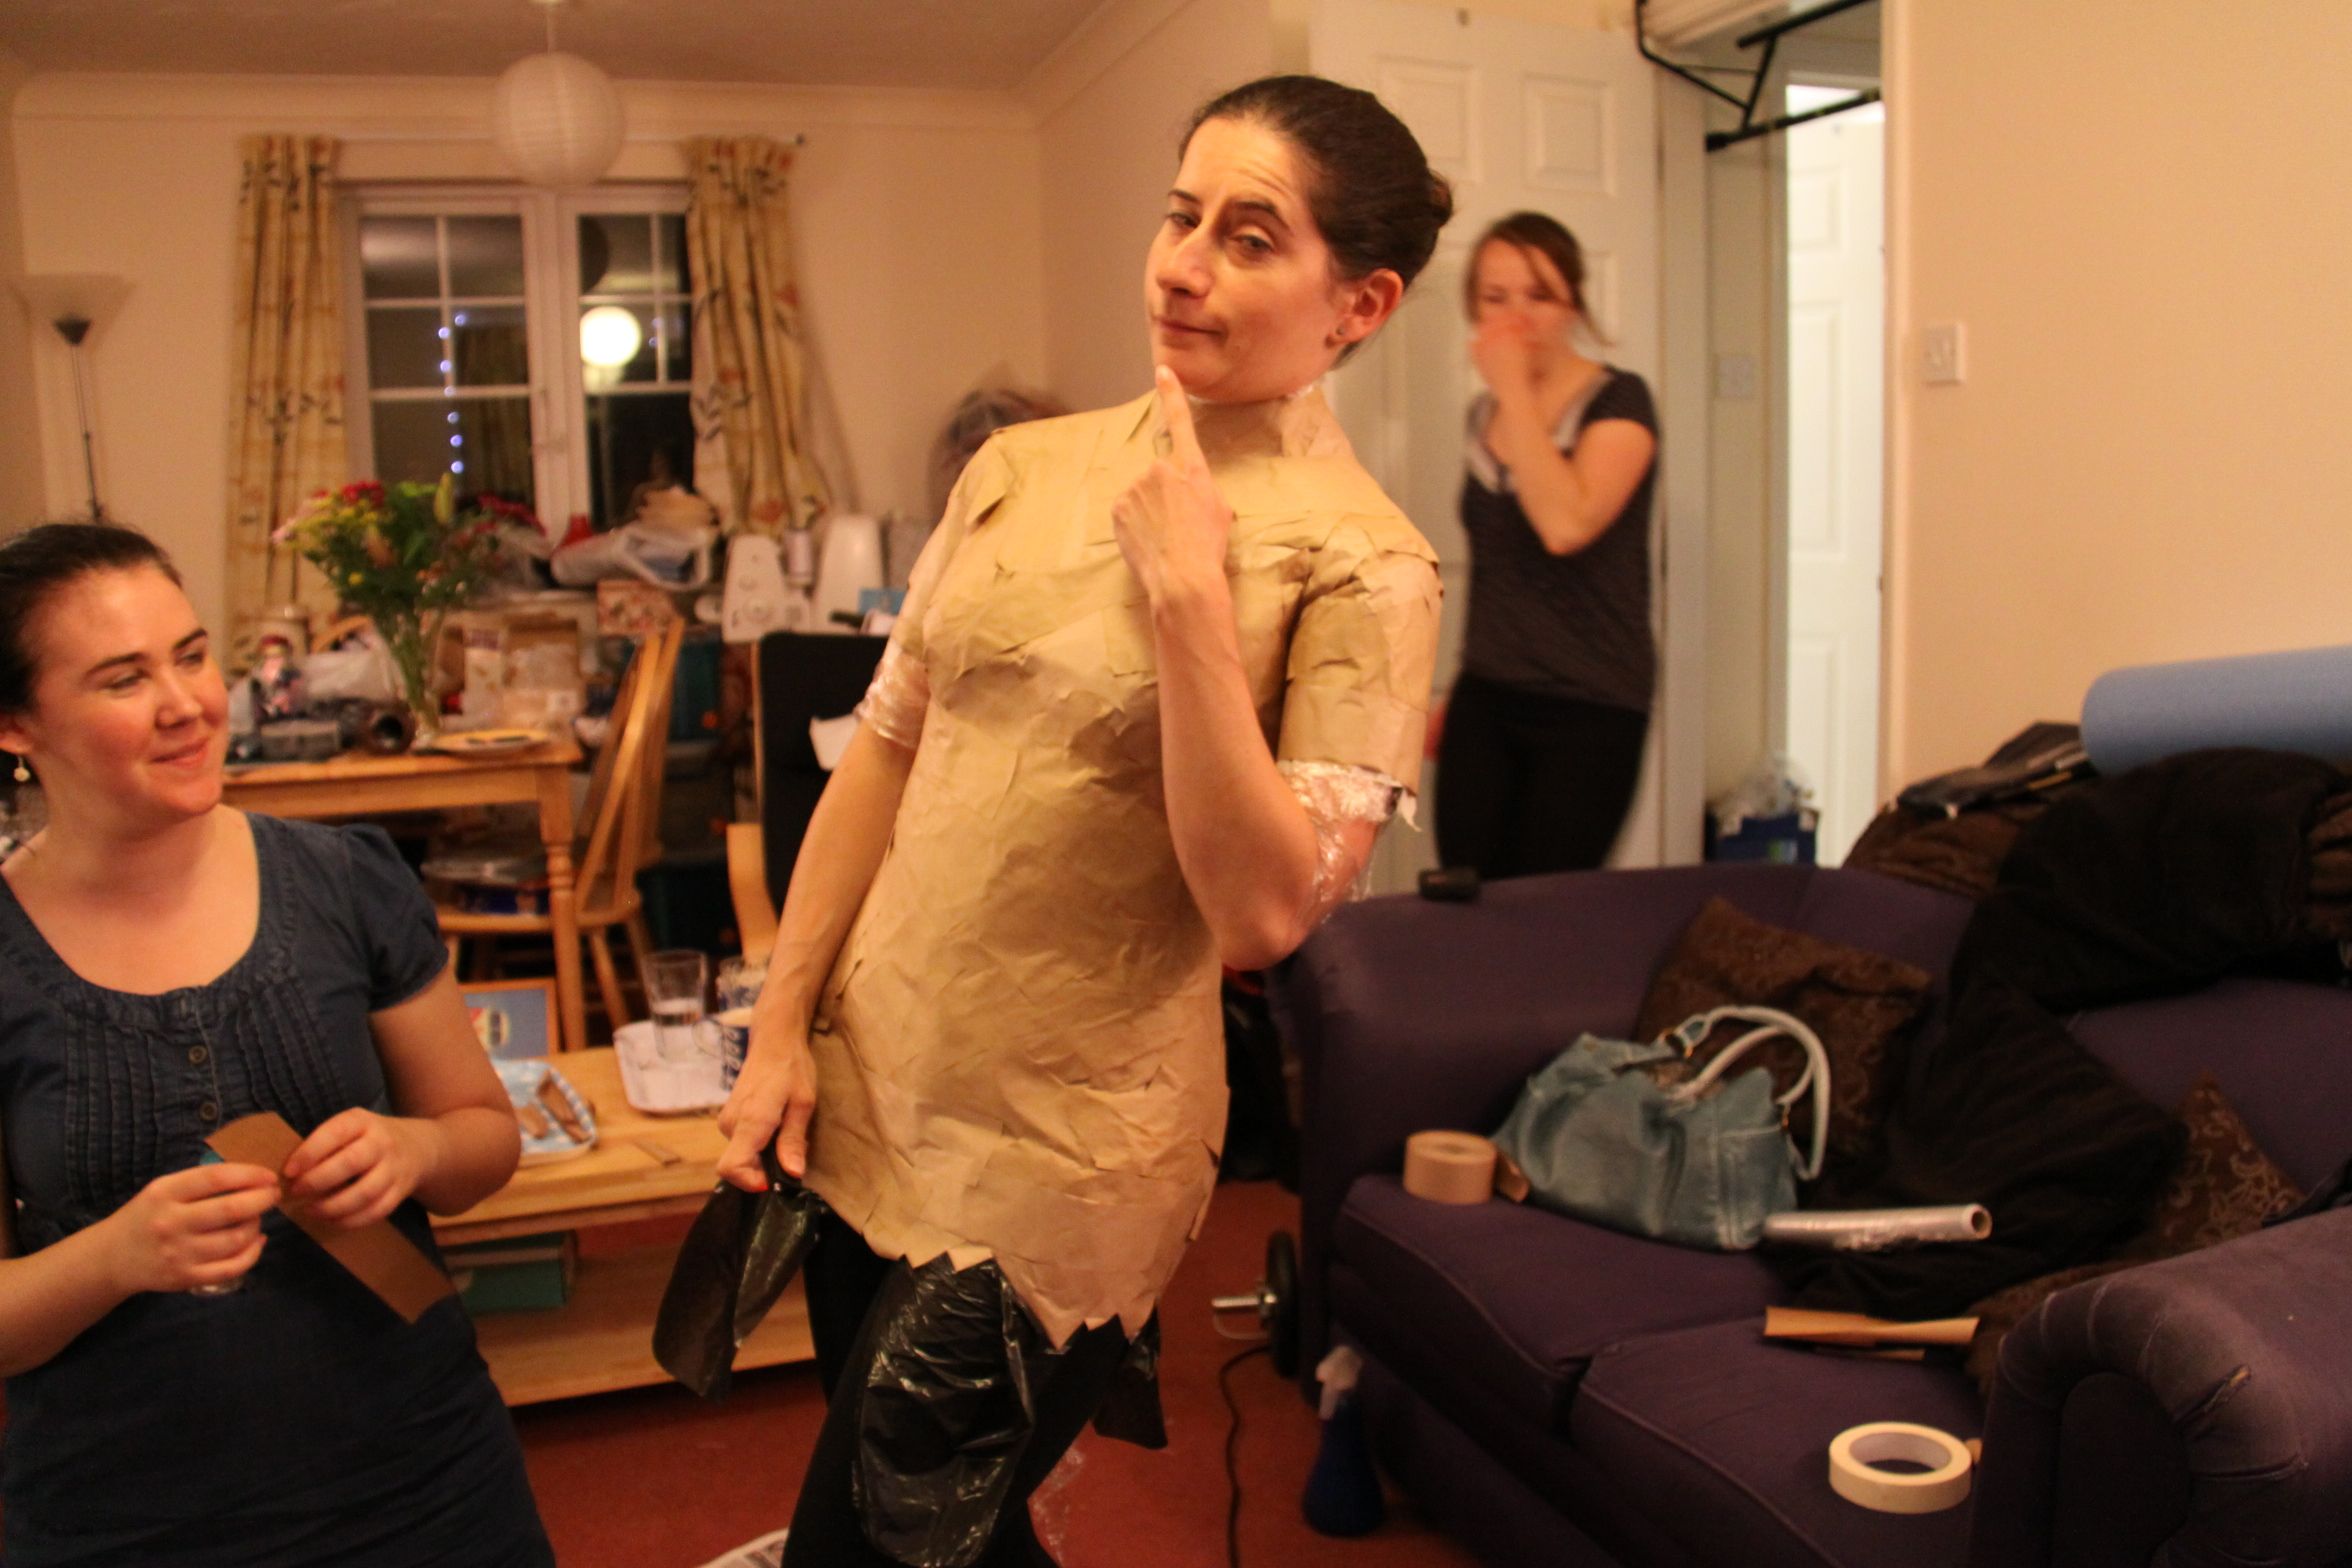
Clare and I opted for sacrificing a long-sleeved t-shirt to which the tape would be stuck, and Marion went for the bin bag option. We all wore leggings on our bottom halves, and then just used clingfilm to wrap our bums, and necks, and any other parts that weren’t covered by t-shirt/bin bag.

Marion in her bin bag!
We had planned on using sponges to wet the paper strips, but on one blog, I’d seen the idea of using a spray bottle to wet them instead. I happened to have a couple at home, so thought we’d try them. I tried one strip with the sponge, then switched to the water bottle, and didn’t look back! It made it SO much easier. It meant the people taping could keep the water bottle in their hand constantly, rather than always having to go back to the table with the water and sponges on. Seriously, try it! I think it would have taken us an awful lot longer if we hadn’t been using the bottles!
Before you start, do go to the toilet first! And it’s a good idea to wear flip flops, or other shoes, to cushion your feet a bit – it’s a long time to be standing up. If you have a tendency to get cold feet, socks are also a good idea!
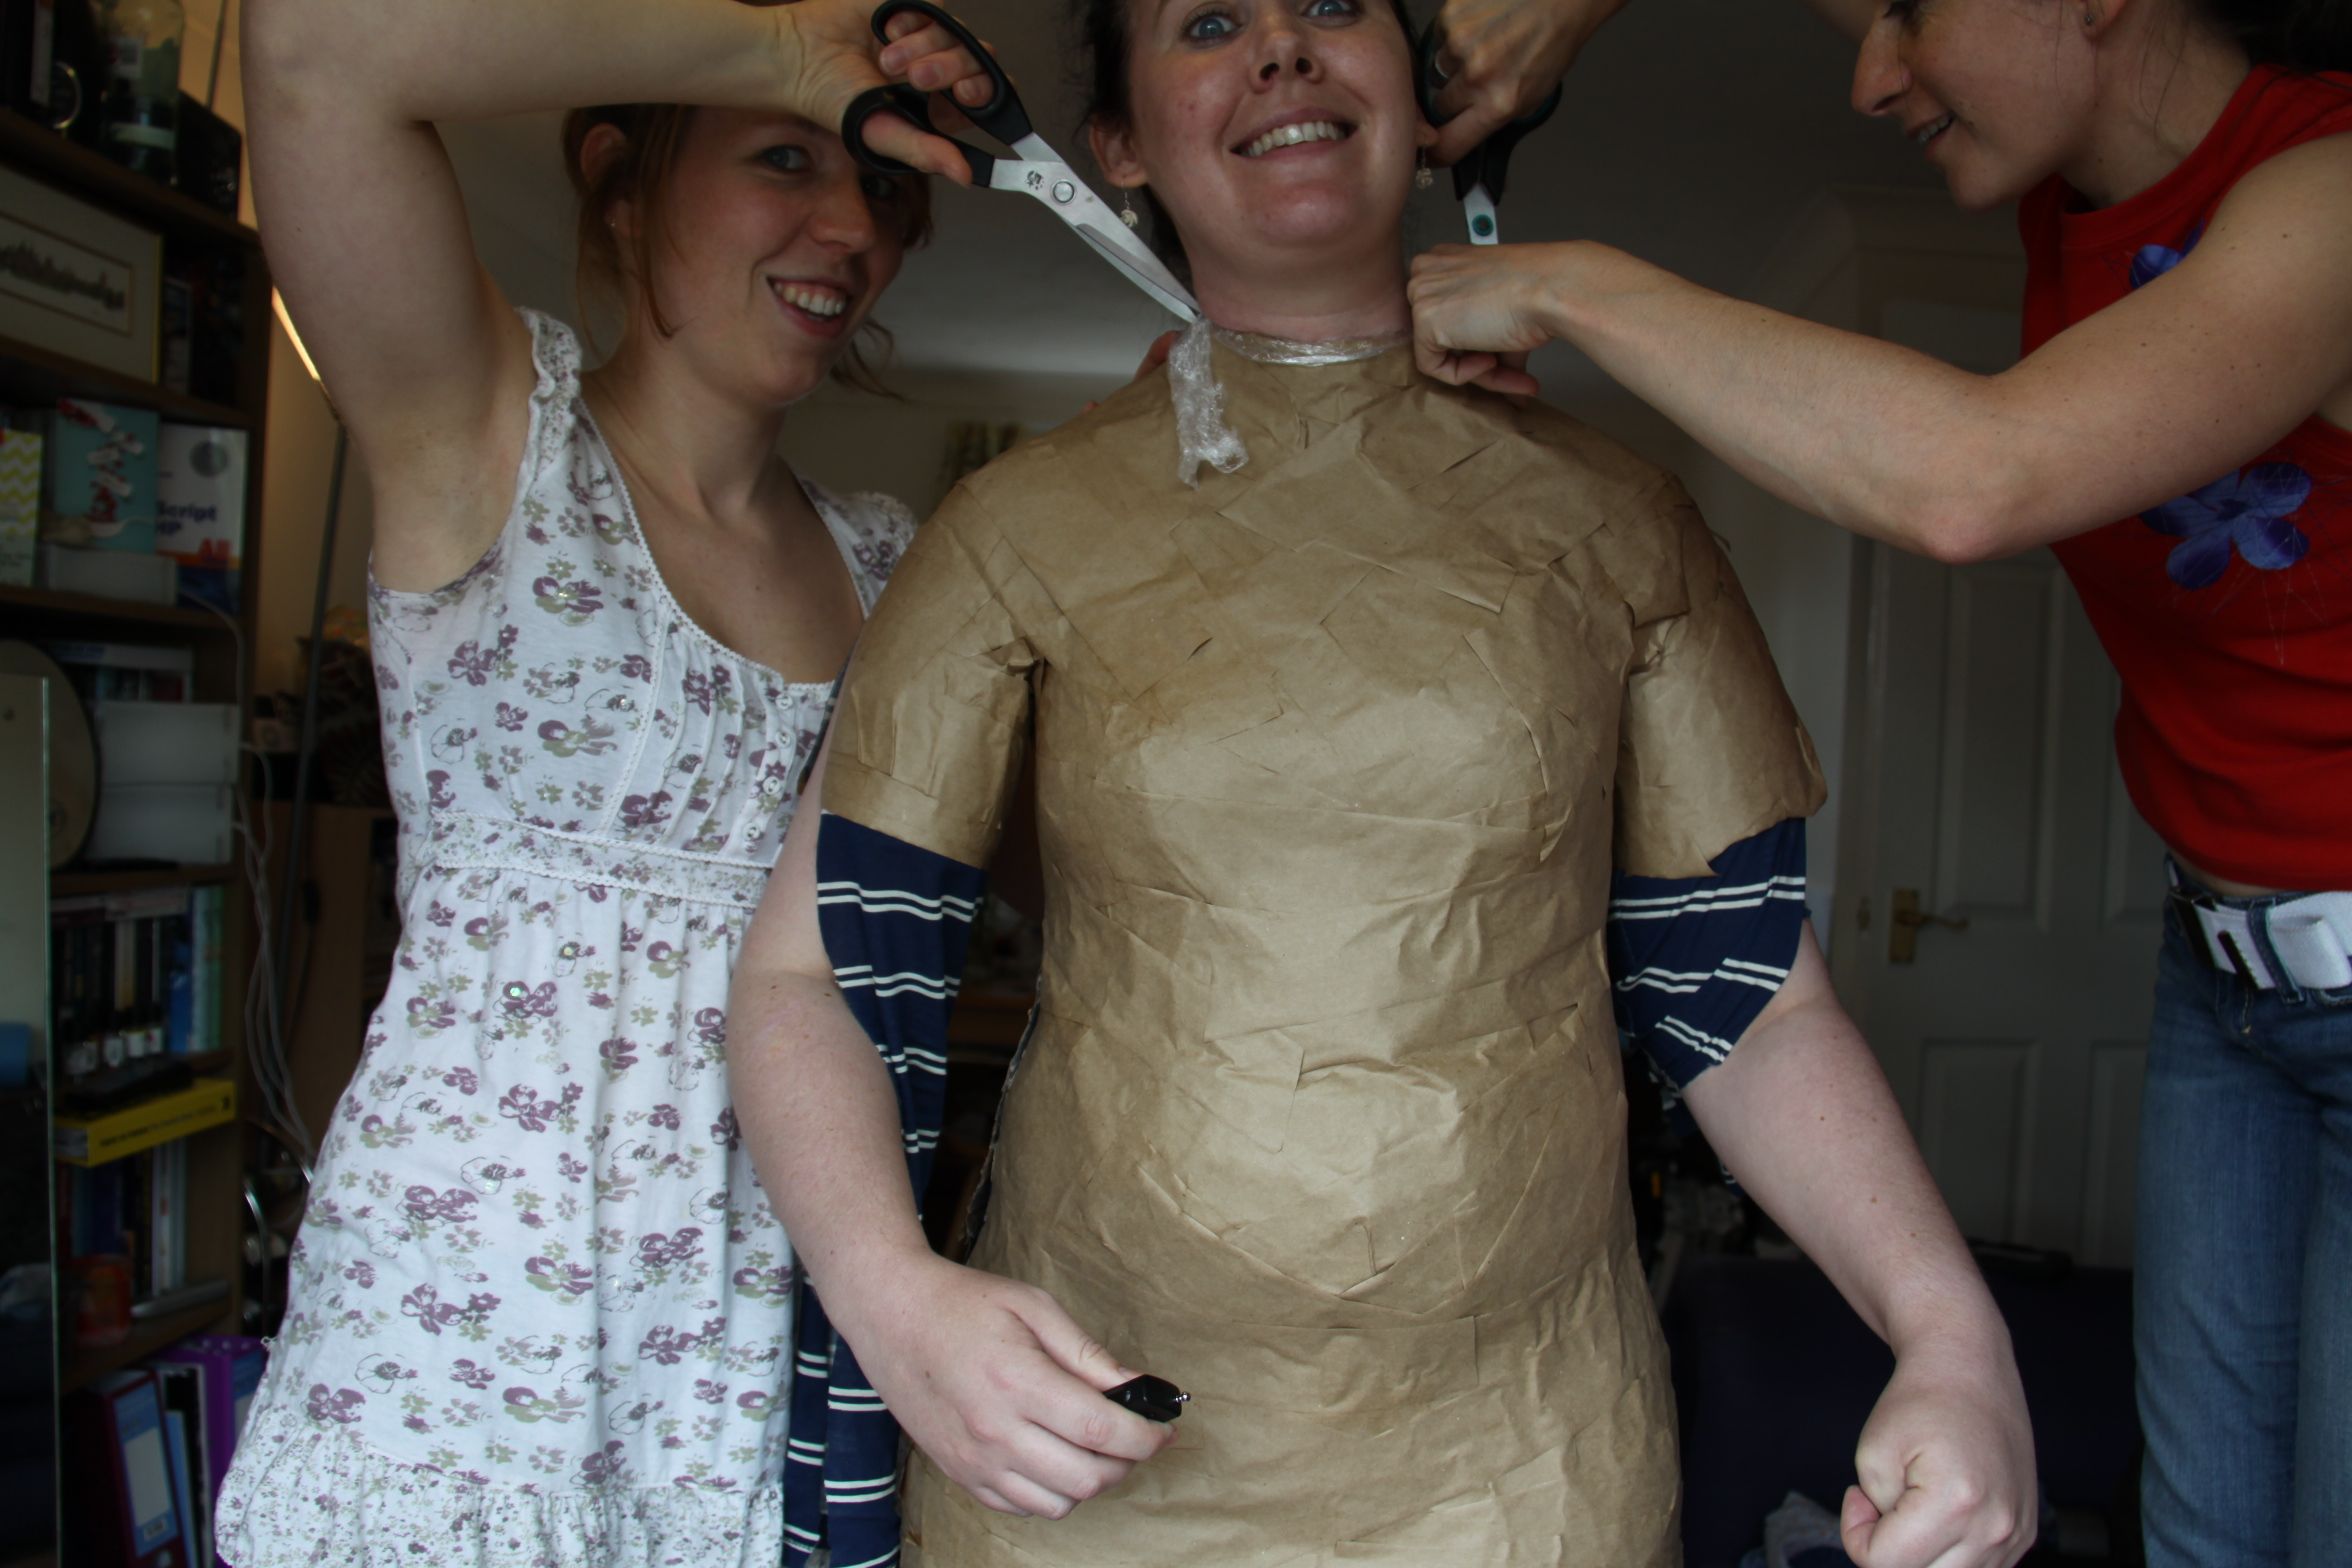
Tie your hair up before you start, and it also works well to put some hairspray on those fluffy bits just above your neck, and smooth them upwards. We didn’t for Clare, and some bits of her hair ended up getting stuck in the tape on her neck!

Quite proud of my crosshatching! Started with the camera facing the window…

…then realised that we needed the light behind the camera, so you get shots of my messy living room instead!
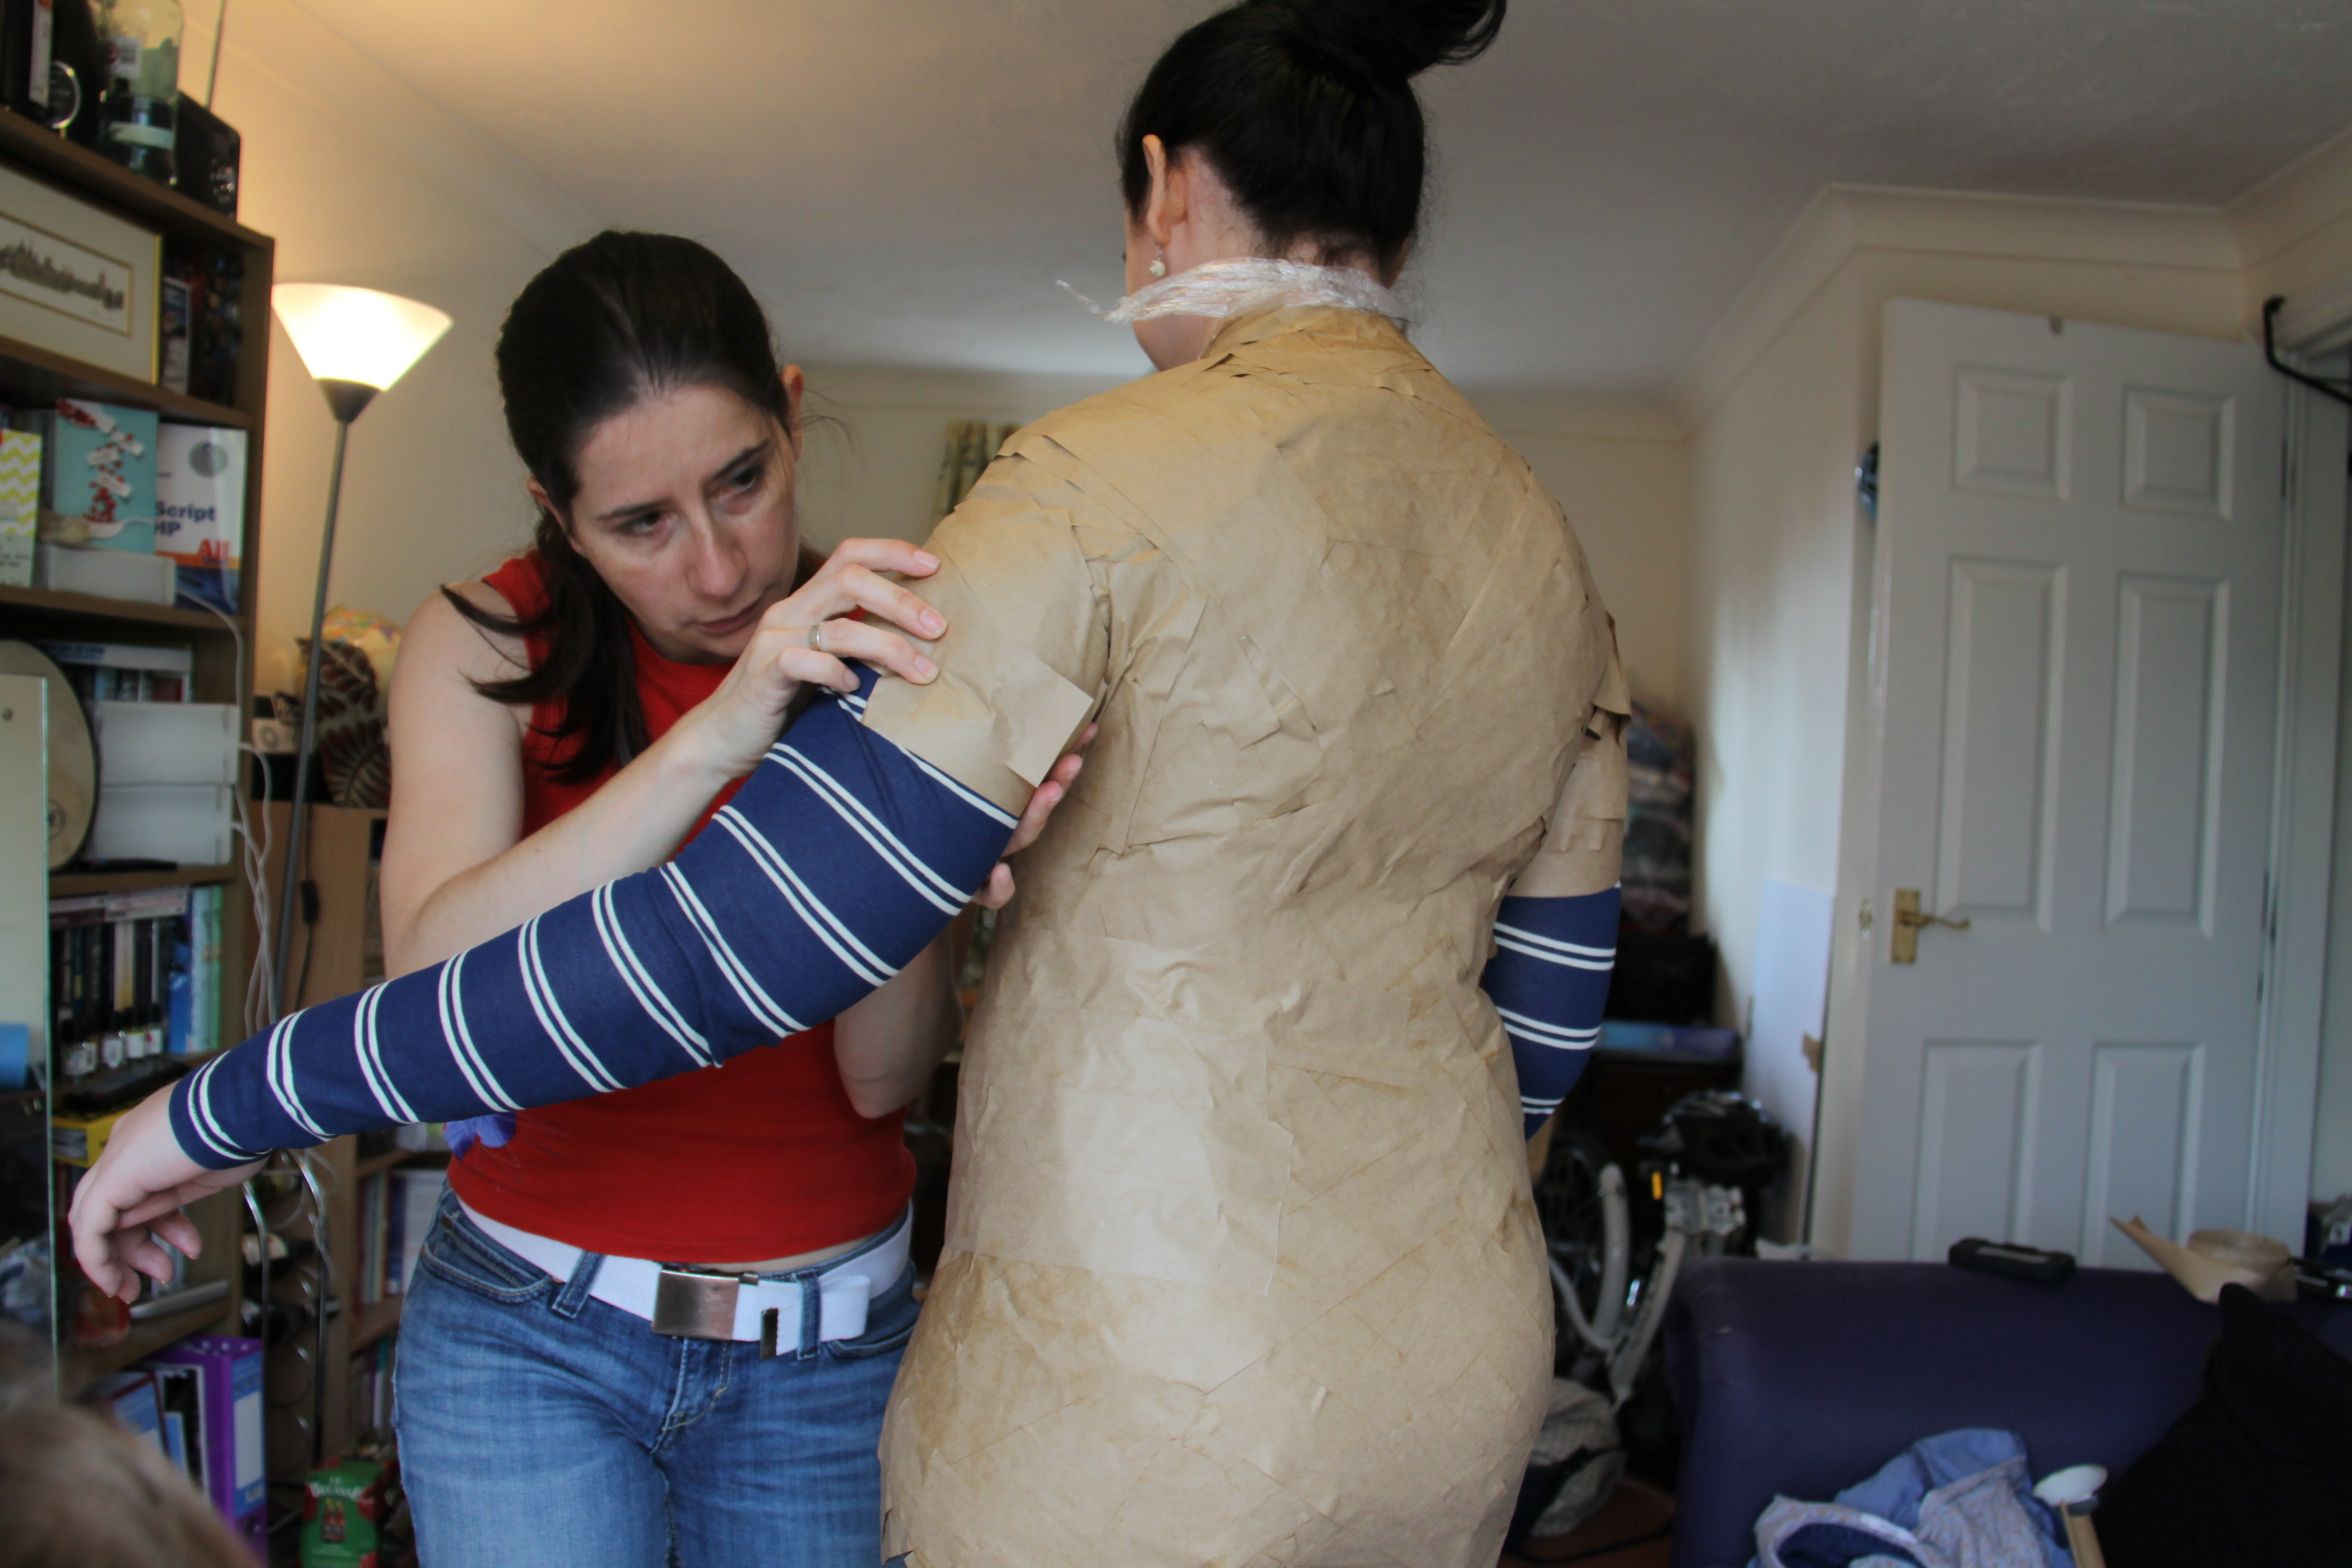
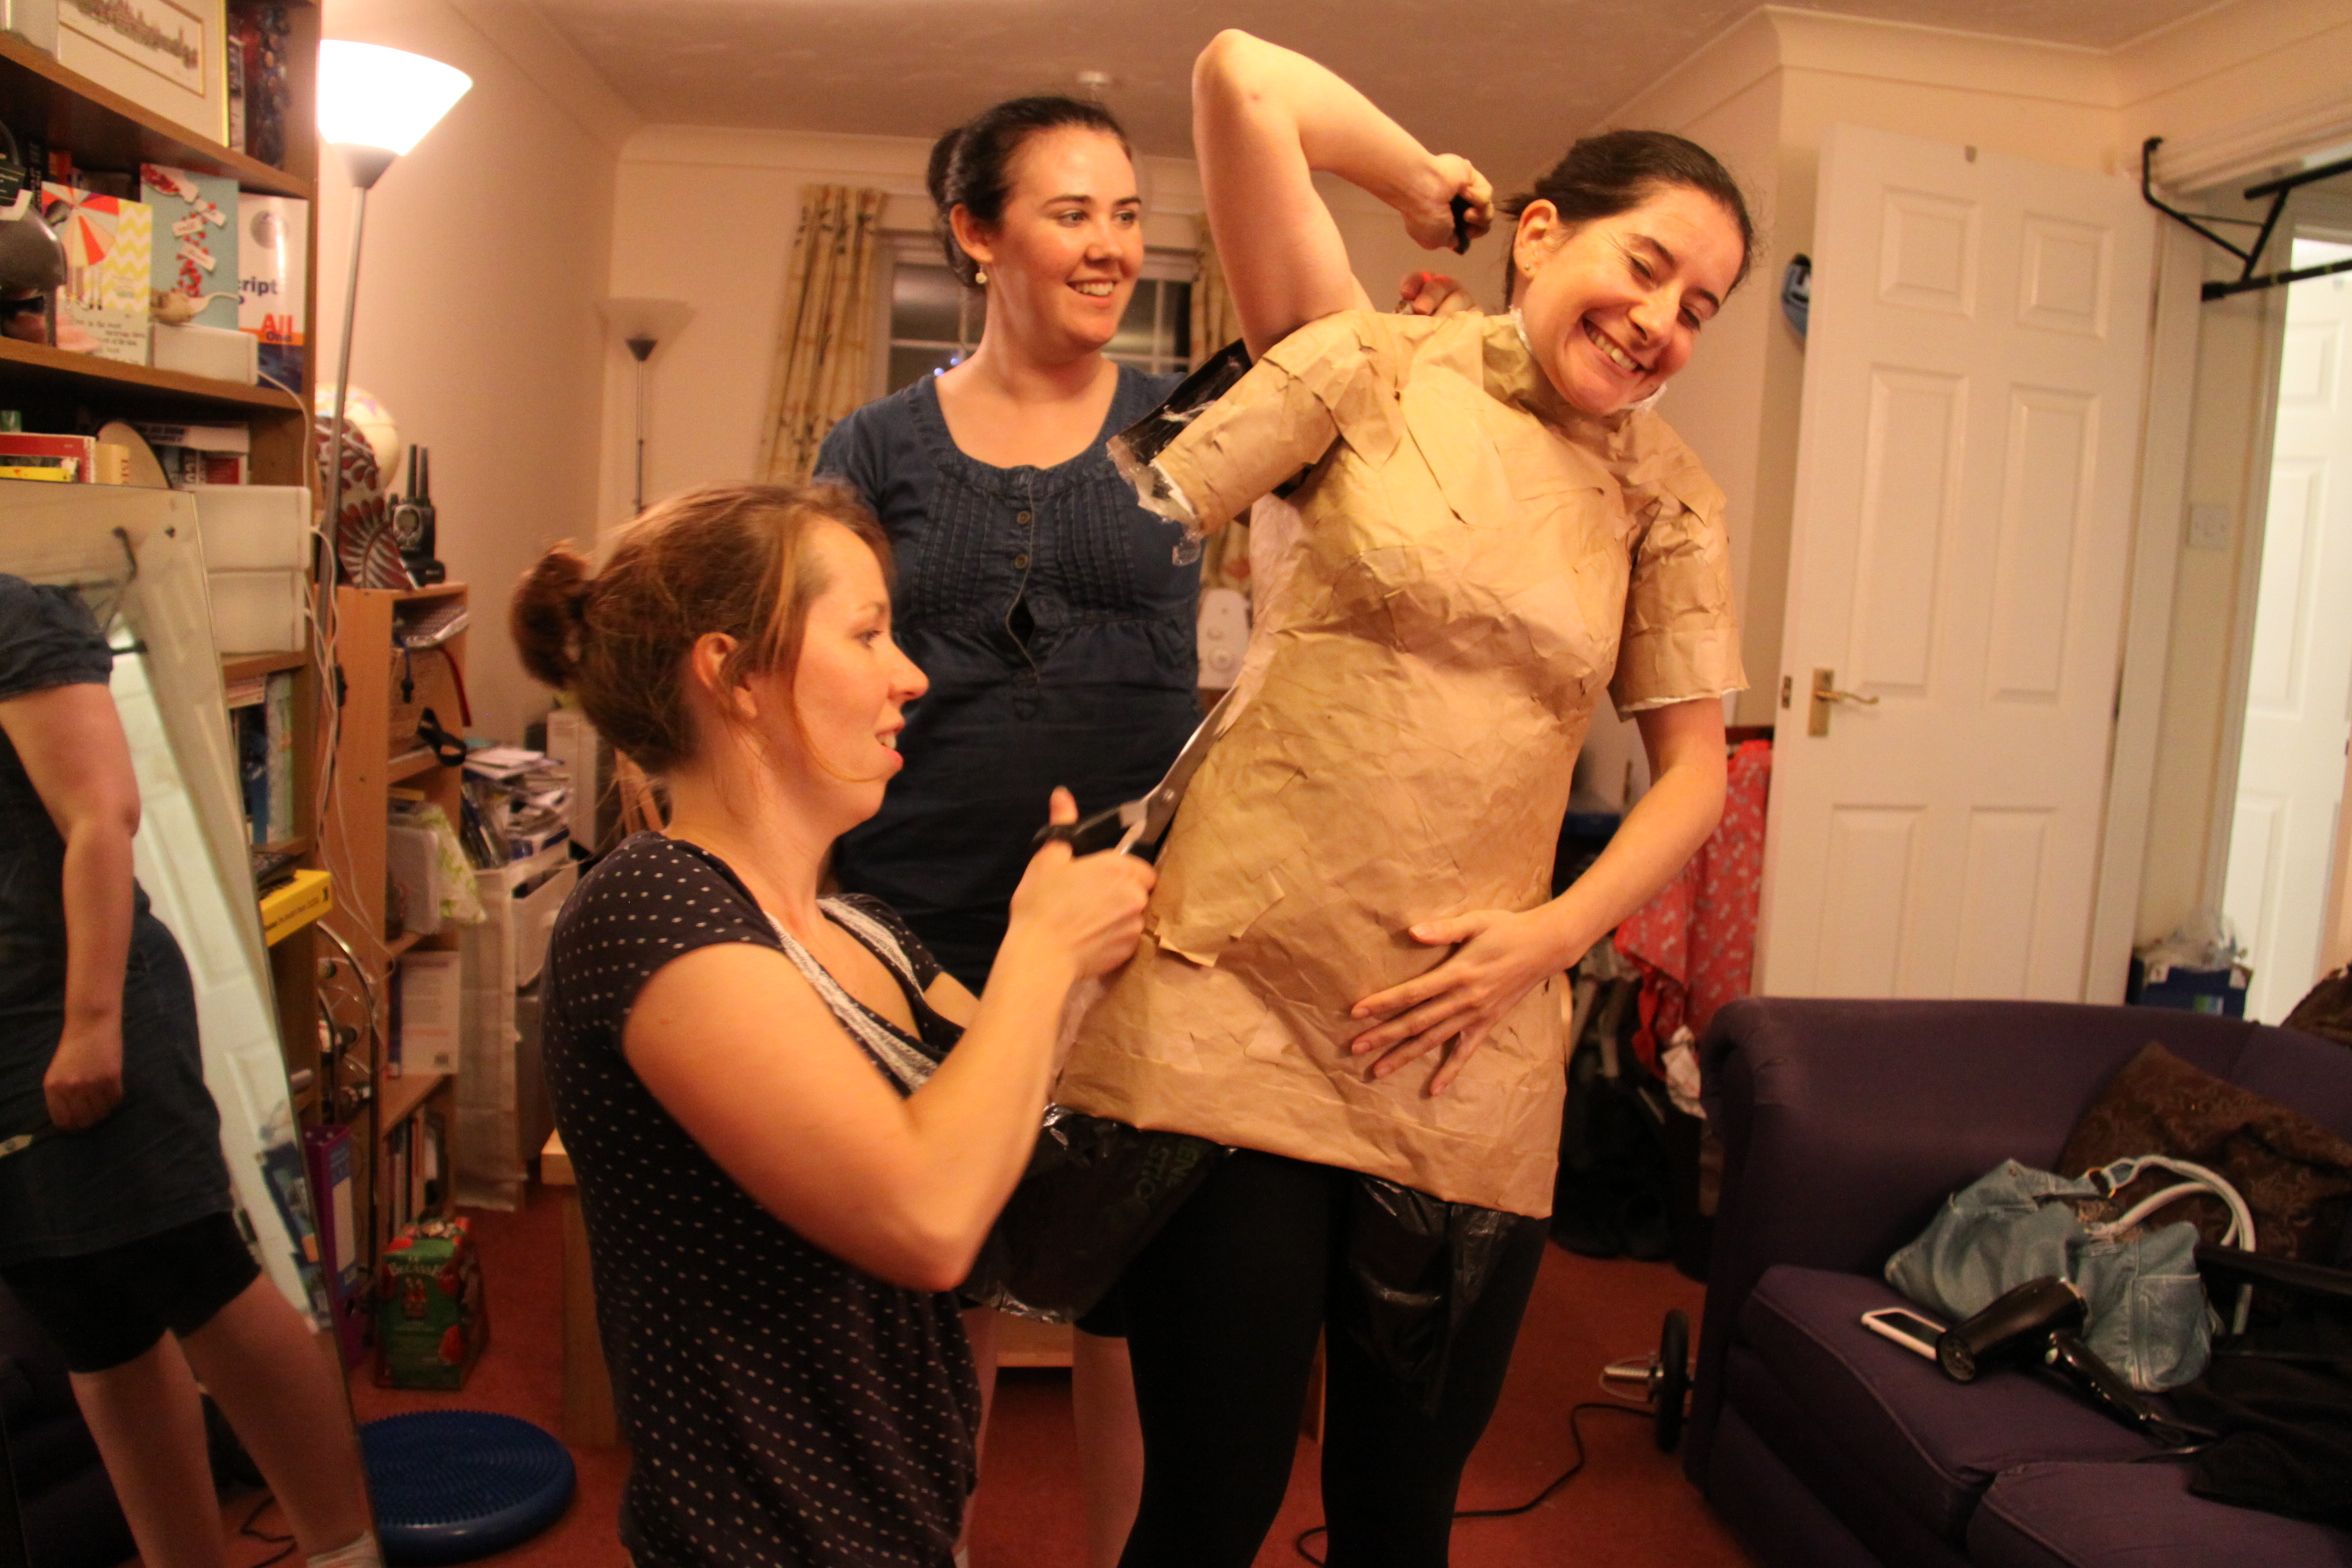
We started taping on the chest, and the back, with a kind of cross hatch pattern, using the smallest, thin strips, We then worked up to the shoulders, and down over the stomach, and round the hips. On all of us, the stomach was the hardest part to get right – I guess it probably moves quite a bit as you breathe, and none of us felt that the taping on the stomach was particularly tight. And I don’t think it was just denial that our stomachs really look like that! Hopefully we will be able to remedy that later.
Ahh, such a look of concentration!
Eek!
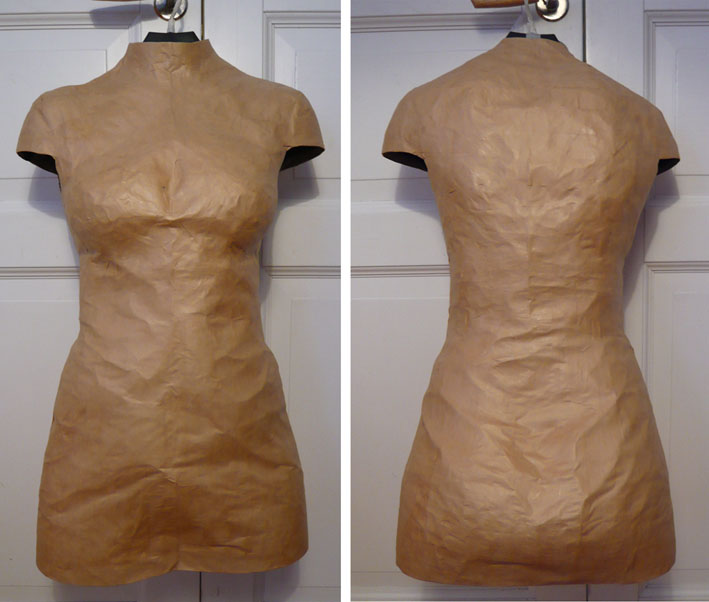
We were aiming to use 3 layers all over, but, once you have the first one done, it is hard to tell where you have put extra layers on and where you haven’t, so it helps to (try and) work methodically. I think we had them all fairly well covered overall, although, having spent a bit of time with her over the weekend, the sides and shoulders/sleeves on mine could probably have done with another layer or two. These bits are hard to get to though, once your arm is fixed in place and you can’t lift it, and we also cut our dress forms off by cutting up both sides, so it may just be that it appears weaker because this was where we cut. I think it’s probably worth adding an extra layer or two on where you are going to cut it, just to try and make sure that these parts hold their shape once it is off.

The aerial on the camera remote control also makes a good scratching aid when you can no longer move your arms!
She’s escaping!
We had a lot of fun doing it, although it is not for the faint hearted! It really wasn’t a lot of fun being taped up and unable to move for a couple of hours. That was the bit that I really wasn’t looking forward to! I have a few problems with my joints and my feet anyway, which means that I really hate standing up for long periods of time, and find it quite painful. By the end, my knees and my back had completely locked up, from not being able to move. The first thing I did once my form was cut off was roll around on the floor, stretching out my back a bit! My feet were also pretty sore afterwards, but it was just about bearable. I also had a bit of a funny turn part way through – I suddenly started feeling horrendously sick, I’m not sure if it was being restricted, or fumes from the glue or what, but it was awful! And all I could think was that I didn’t want top ruin the form or have to take it off at this stage! After opening the doors, and being fed some water, I felt a bit better. We were almost out of tape strips, so I started cutting some more of those (I could just about manage that in my restricted state), both to take my mind off it, and so that one of the others didn’t have to stop taping to cut more strips, and we’d be done more quickly. Apparently I’d actually turned quite pale, but the others didn’t tell me that until afterwards! The sense of relief when you are cut out is amazing!

We decided Marion looked a bit like a warrior in her paper tape armour…so Marcus gave her a sword!

And another sword!
Funny turns aside, we all survived, only one bra strap got accidentally cut (sorry Clare!) and we had 3 beautiful looking dress forms at the end of the day. In total, it took us about 7 hours to do the three of them, including breaks for cake and tea, with two people working on each form for most of the time.
I got a little trigger happy with the camera remote when I was being taped, so I made a little time lapse movie for you all!
Our top tips:
– go to the loo before you start
– tie your hair up, and hairspray the rest out the way
– wear flip flops/shoes
– cut as many strips as you can in advance – lots of short and thin ones (the person being taped can always cut more as you go)
– use a water spray bottle to wet the strips
– work methodically to make sure you get the number of layers you want everywhere
– add an extra layer on the bits you’re going to cut
– make it longer than you want, you can always cut it down afterwards
– do it with close friends – there’s a lot of boob and bum touching!

Um, yes!
As I mentioned before, I want to try using this form that we created as a cast to create one that is actually my exact size (give or take), using these instructions. To do that, I need to line this form I’ve made with foil (to stop water soaking through), then a layer of felt, and then more layers of tape. I wanted to make sure that the original one was strong enough that when I did this, it didn’t misshape at all, so over the weekend, I added some more tape on its weak points – mainly down the sides, where it was cut, and across the shoulders. As I’m not actually planning on using this one as the form itself, I wasn’t too worried about adding extra thickness. I also found a novel way of making sure it kept its shape once the paper tape was a bit damp again (after I’d got bored of wearing half of it at a time, strapped to me with a wide belt!).

She is currently taped up around the cut edges again, as the edges weren’t meeting up all the way round, and I wanted to make sure she was shaped properly before starting the next stage. Perfectionist, moi?
I’ll do another post on that second part once that is completed, but for now I’ll leave you with some photos of Marion dancing :)