Last weekend I was on a friend’s hen do. She is the first one of my close friends to get married, and it was my first hen do, so exciting times! I had the idea a little while ago that it would be nice to give her a hand made wedding garter, as a memento. This idea was cemented when the bridesmaids asked us all to bring a small present for her to the weekend.
I had a vague idea in my head of what I wanted it to look like, and looked up a few tutorials online for some construction guidance. I decided to go for one that used the ribbon as the elastic casing, as opposed to making a separate casing out of fabric which I would then need to sew on.
The garter is essentially a ribbon and lace sandwich – 2 lengths of 1 inch wide ribbon with a wider piece of lace sewn between them, and the elastic threaded through one of the channels that is created by this.
I went to Masons to pick up some lace and ribbon for the job. And there was SO MUCH LACE. I think it actually took me about half an hour to choose some, and even then, I ended up with about 6 different ones which I ended up buying to try. I knew I wanted something thick enough that it would show on both sides of the ribbon (the other option it to just sew the lace onto one edge of the ribbon), and because of that, I wanted one that was shaped on both edges. I wasn’t sure if stretch lace would work well or not, so I was originally looking for non-stretch stuff, but ended up buying some of both. I did end up using some of the stretch stuff in the end, and it worked fine!
I bought ribbon to match the colour theme of the wedding, in a couple of different widths (I wasn’t entirely sure at this point what width I needed…this was all a bit of a guessing game!) and a little ribbon rose in a similar colour to go on the front. I already had elastic to use, and the construction was actually fairly straightforward:
– If you can, measure the thigh circumference of the person you’re making it for – a little way above the knee is apparently about right. If you can’t measure and don’t want to ask them because a) it’s going to be a surprise or b) you don’t want to sound slightly odd, then guesstimate, or measure your own and hope theirs is fairly similar! As it’s elasticated and gathered anyway, there’s a little leeway in terms of fit.
– To work out the length of ribbon and lace you need, a few of the tutorials I looked at suggested multiplying the thigh measurement by 1.5. I did this, which gave me a measurement of 75cm. Given that my two pieces of ribbon were 1m long (When I was buying them, I forgot that I needed enough ribbon for both sides, and asked her to cut 1m before I remembered I needed another). Knowing that I probably wouldn’t have much use for 25cm lengths of ribbon, I sewed it up with the full metre, and then trimmed it afterwards to where I wanted it. So somewhere between 1.5 and 2 times thigh circumference should work, depending on how many gathers you want. And yes I do realise that I use a complete mishmash of metric and imperial measurements in this post – am I the only one who uses both when sewing, depending on which is the most convenient number?
– Pin the two pieces of ribbon (with right sides, if there is one) out, onto either side of the piece of lace. I did this by laying one piece of ribbon on top of the lace and pinning, and then flipping it over, matching up the second piece of ribbon, and then pinning again, through all 3 layers. I then took out the pins from the first side. You could just pin all 3 at once, but I thought it would be easier to make sure both pieces of ribbon were lined up to each other, and centred on the lace, if I did it this way.
– Once your ribbon and lace are pinned, sew two straight seams (or straight-ish), one down each edge of the ribbon. For 1 inch lace, use about a 1/4 inch seam allowance (this allows enough space in the middle for the elastic to go through). It doesn’t matter if the ribbon puckers slightly when sewing the seams, as this will be hidden in the gathers.
– Once they’re sewn, you should have a piece of lace, with a length of ribbon sewn to each side. Next you need to cut your elastic. The general guidance seems to be to take 1 inch off the thigh measurement. I started with that, but did actually end up taking more off later. 1/4 inch elastic is ideal for this.
– Using a safety pin attached to the elastic, thread it through one of the channels created between the ribbon and lace. My lace seemed to have a slight right and wrong side, so I fed it through the ribbon on the wrong side. Before the other end of the elastic disappears inside, use another safety pin to pin that end, so that you don’t lose it. Once the elastic is all the way through, pin the end you’ve just pulled through as well.

It doesn’t matter that the ends of my lace and ribbon don’t match up, as I’m going to trim them anyway.
– Spread the gathers out evenly along the length of the elastic. If you’re happy with the length of the elastic, and how the gathers look then you can sew it as is. If not, you can do what I did and spend half an hour playing around with different lengths of elastic and lace, hold it round your leg and ask your boyfriend if it looks right (to which he answered that he didn’t really have any idea what it was or what it was meant to look like), and eventually settle on lengths for both.
– Sew up each end, to hold the elastic in place, and then, turning the garter so that right sides are together, and making sure it’s not twisted anywhere in the middle – easy to miss when it’s all gathered up, sew the two ends together. You can skip sewing the ends individually first if you like, but I found it easier. Once the two ends are sewn together, trim the seam allowance.
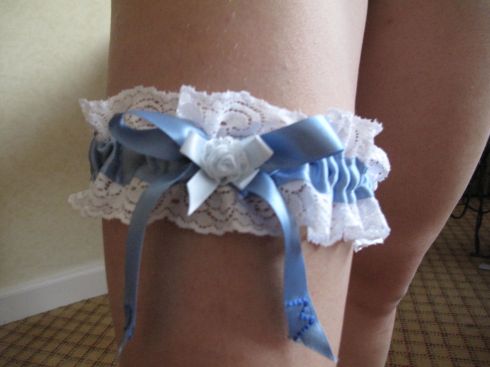
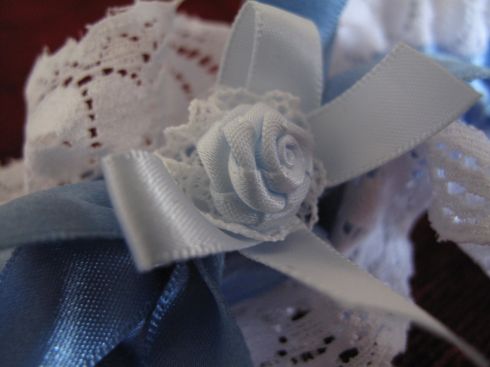
– You should now have a basic garter to embellish as you wish. I went for a ribbon bow on the front, followed by the little ribbon flower which I glued on top (slightly wonky because I stopped to put the lid on the super glue before positioning it properly, and the glue set in the meantime!). Turns out it was a good thing I ended up buying more than one width of ribbon, as I used the narrower one to make the bow.
I forgot to take pictures while making the bow, but this page has some great tutorials for different kinds of ribbon bows – I made the hand tied bow at the top.
To make it more personal, I embroidered the bride and groom’s initials onto each tail of the ribbon bow. If you do this, make sure you leave enough space for the letter you’re embroidering, so that it’s not almost falling off the edge like mine is. I thought about re-doing it, but… I’ll know for next time!
Once you’ve finished your embellishments, you have a lovely hand made wedding garter. Whether it is a gift, or for yourself, it’s a really nice personal touch. And a really quick and easy sewing project as well! I have a few more friends who have got engaged recently, so I can see myself making a few more of these in the future.

Slightly fuzzy picture, oops, but unfortunately it’s the best of the on-leg finished ones I have! Thanks to my friend Clare for modelling it.
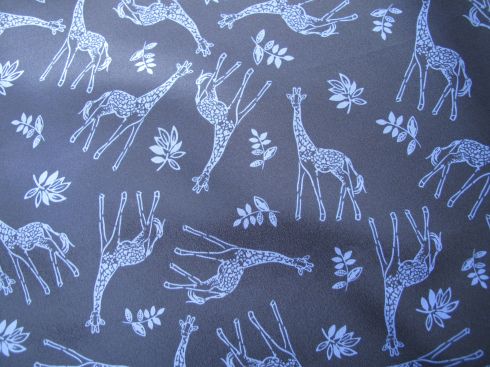
And now that holidays and hen-dos, and urgent related sewing projects are out the way (not that that is a good thing), I have some time to get on with making some more dresses, it feels like its been ages! I’m currently working on a tank top plus added skirt creation, with my lovely giraffe print fabric from Walthamstow, so hopefully I’ll have something to show for that soon!


The garter is really pretty, great job! Can’t wait to see what you make with the giraffes, that fabric is amazing.
Thanks, I’m really happy with how it turned out and she seemed to like it :) the giraffes were my attempt to buy/make something a bit more quirky than I normally do, but until now hadn’t figured out what to make with it – I think a whole dress of giraffes might be full on! Hopefully this will work, in which case there will be pictures soon!
This is really nice! I did the same for my friend a few months ago, but wove blue ribbon through some lace/broderie anglaise holey ribbon. And I had to do the same “is her thigh the same size as mine?” estimations for the elastic!!
Thanks Tania! I really like the sound of yours – might have to give that kind a go next time! With the sizing, I just figured they’d have to wear it higher/lower on the leg, depending on where it fitted!